3ds Max: UVW Unwrapping For Dummies
Posted: Sat Jun 18, 2005 3:42 pm
For all of you that want to learn how to unwrap here is a tutorial i made. In this tutorial you will unwrap an hk ump clip.
I NOW HAVE THE ZIP!
Thanks Wraith for uploading the max files.
http://bellsouthpwp.net/c/o/cold_fusion ... torial.zip
If you want a .3ds file ask me on aol
Sorry for the different size images i dont know why it came out like that.
Things you need
- Max 7 (to open my max file, talk to me on aol ill try to get a 3ds)
- Texporter (free download search google)
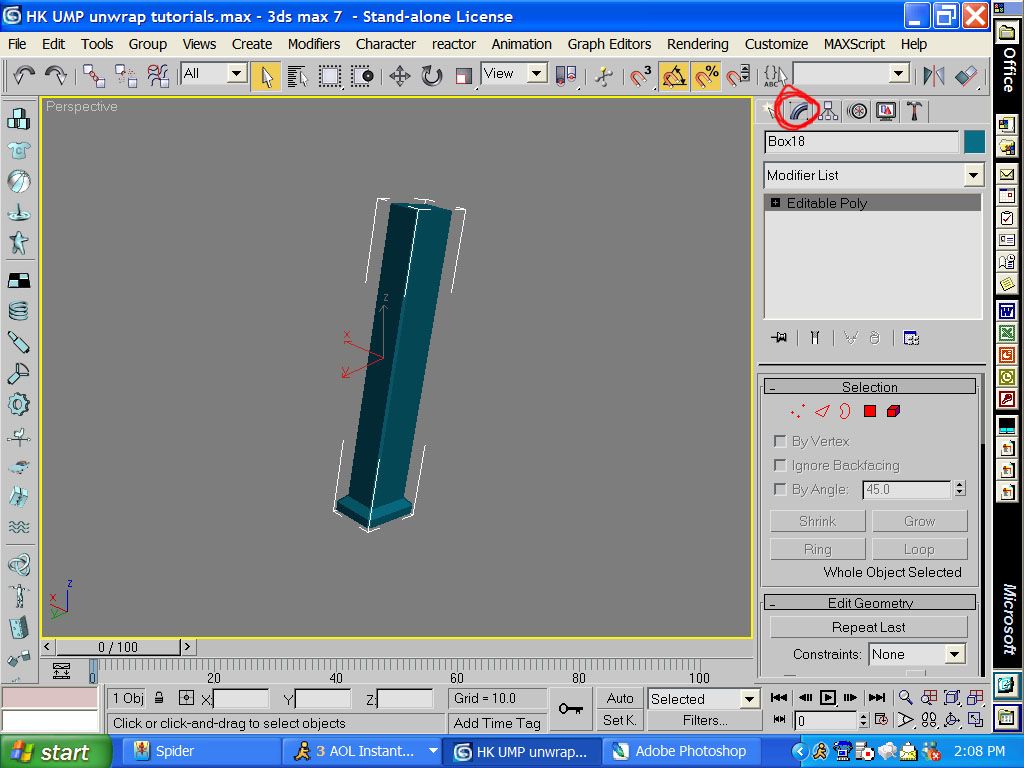
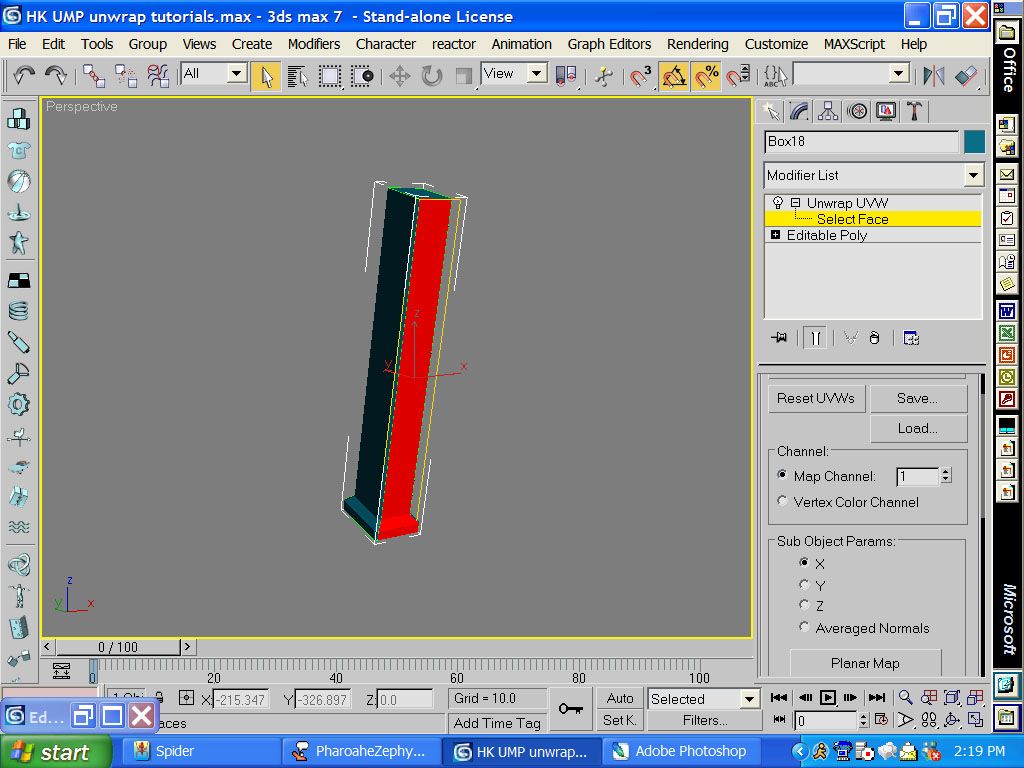
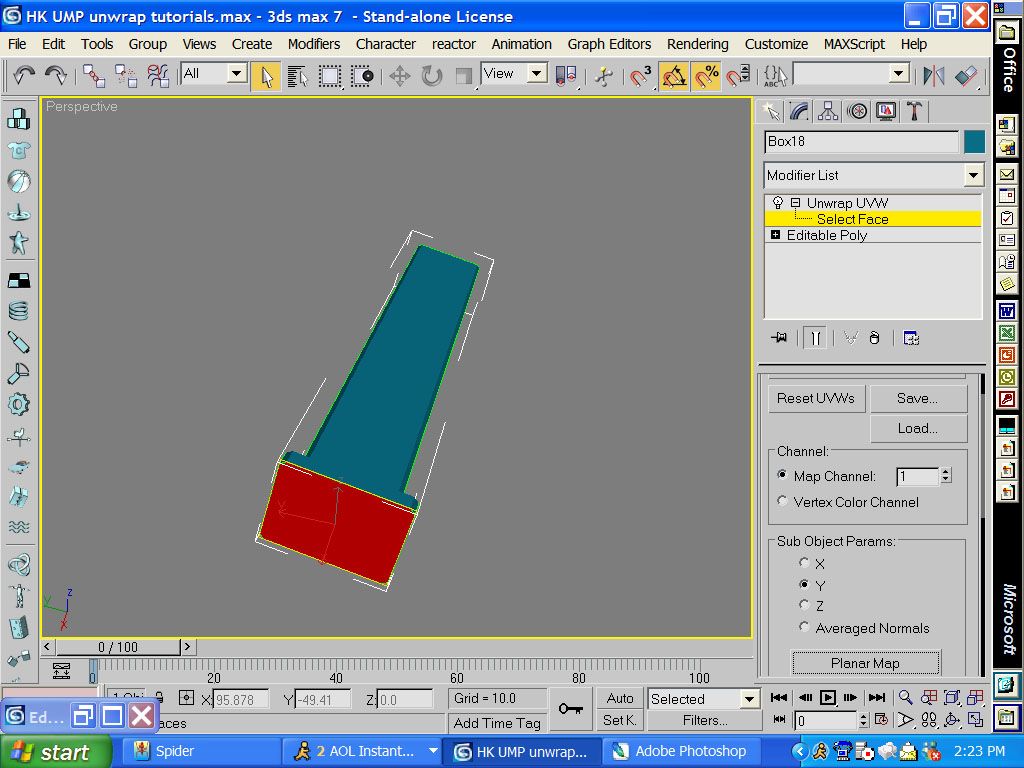
first go to the modifier tab
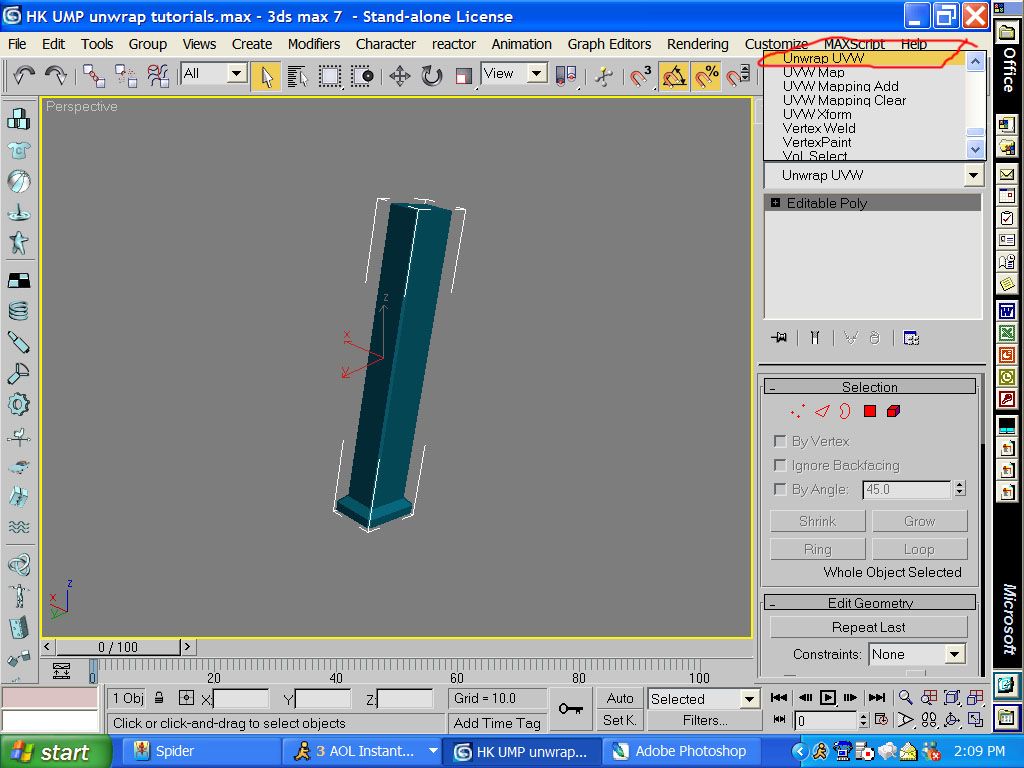
then click on unwrap uvw
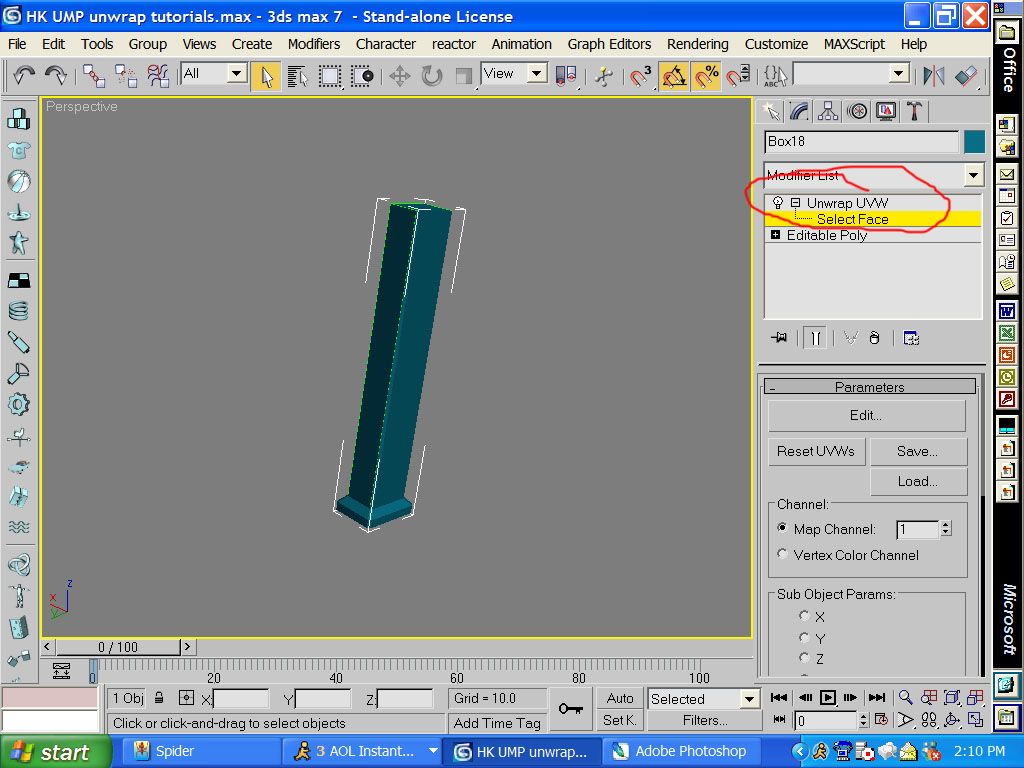
then click on the + sign and click on select by face
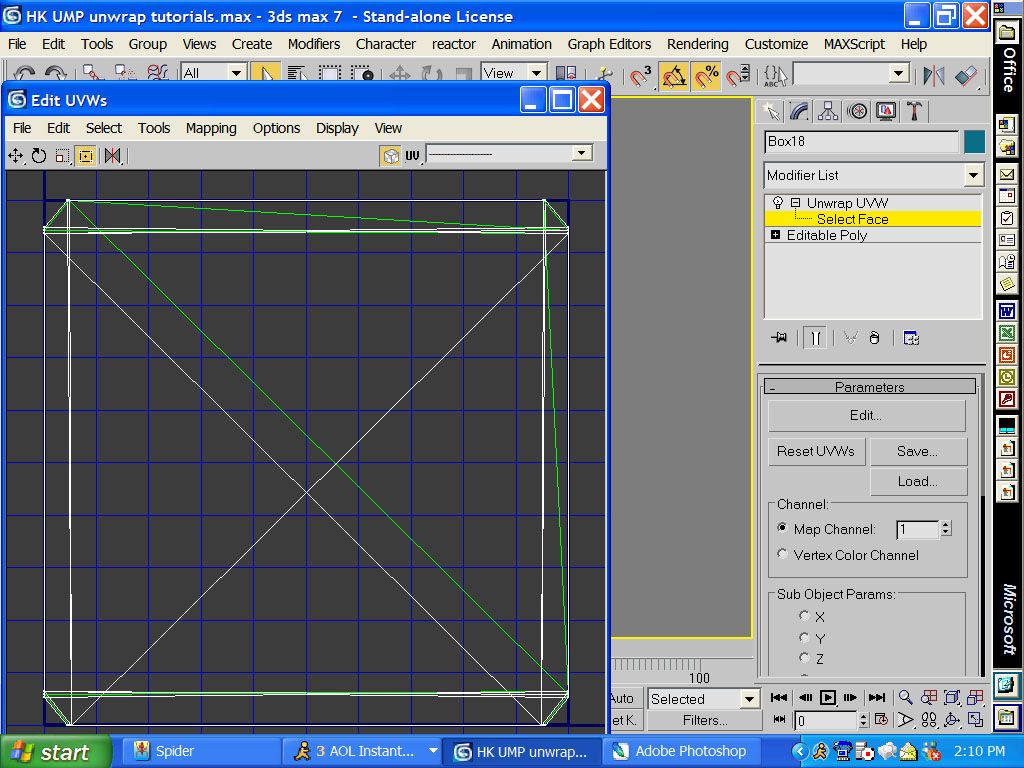
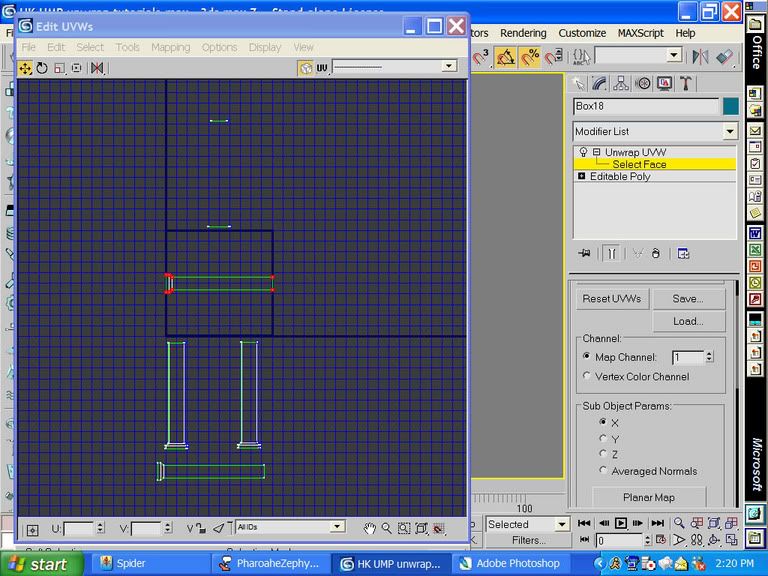
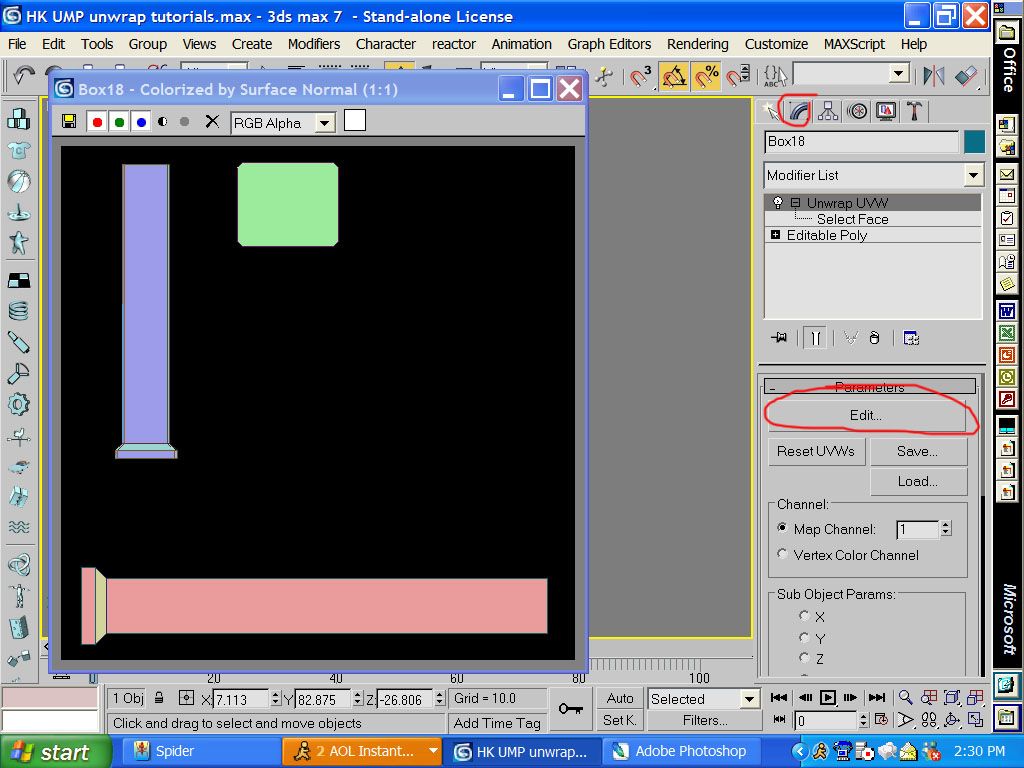
when you click on edit this is the screen that you should see.
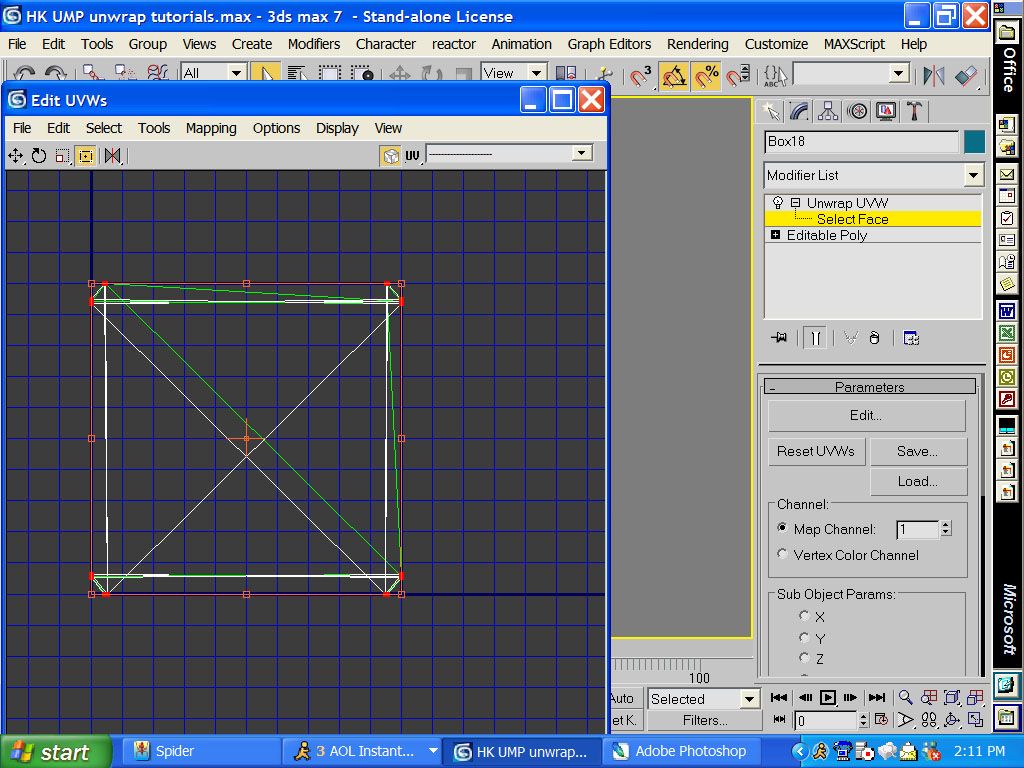
then drag your mouse over everything in the edit box.
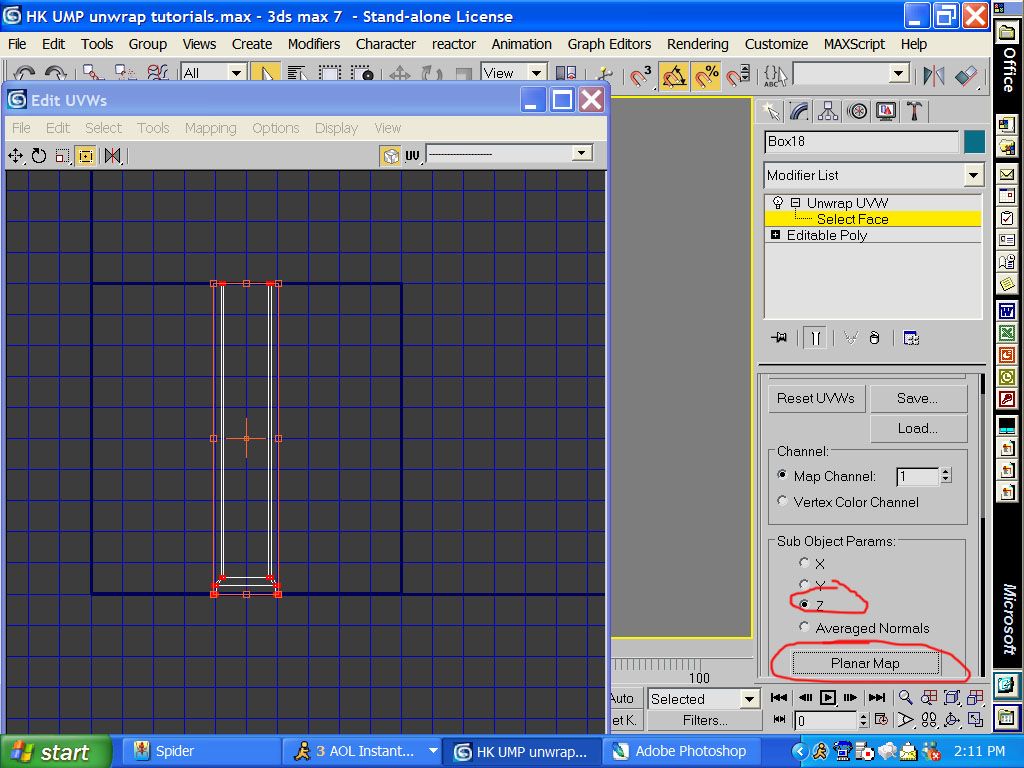
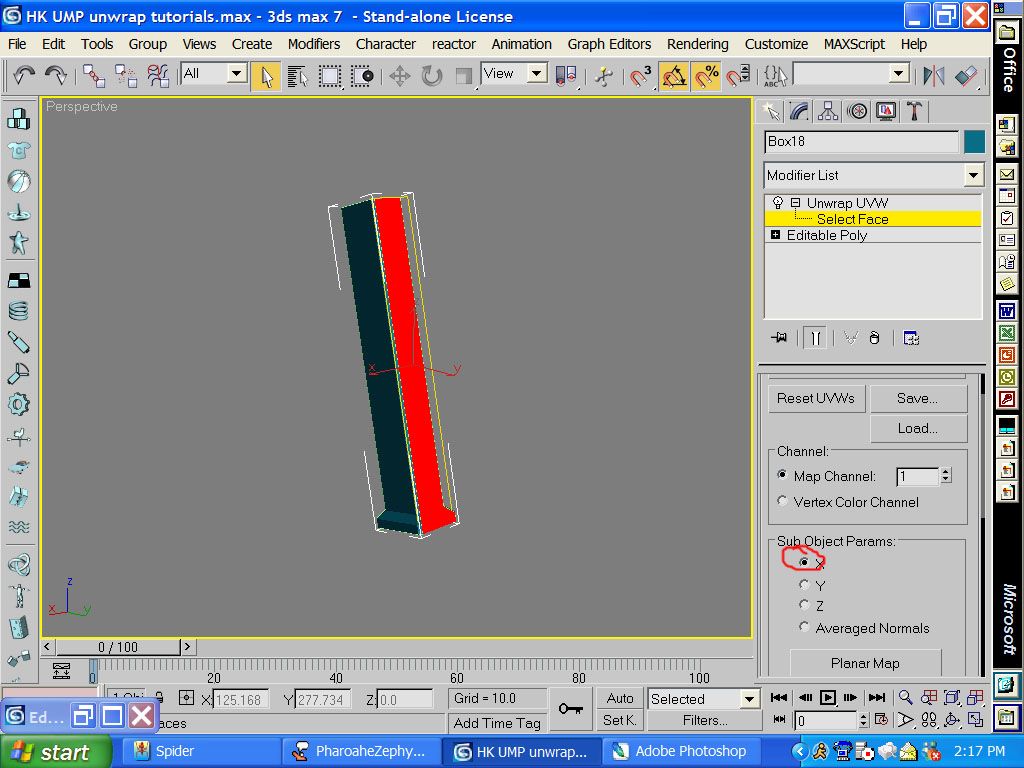
then click on object params z then planner map.
then move that up out of the box. this will be a visual on what you did not map on the object yet. If you ever wonder what you did not map and something is there just drag you mouse over it and it will select the face on the model.

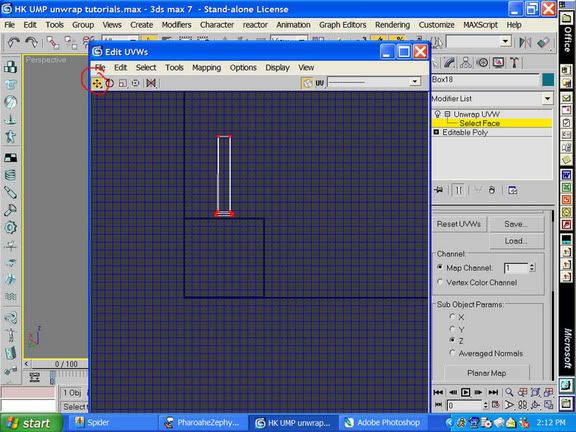
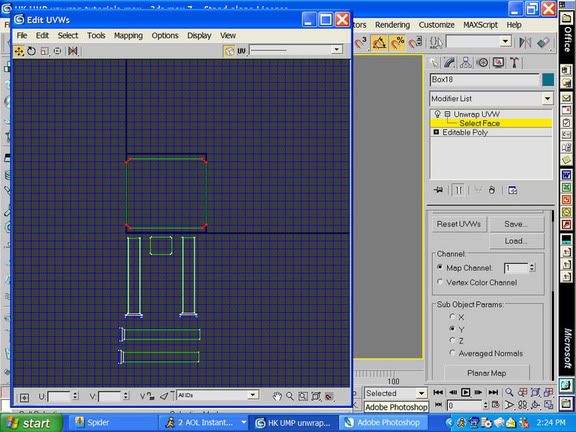
now select the faces on the left side of the model (including the ones that are chamfered)
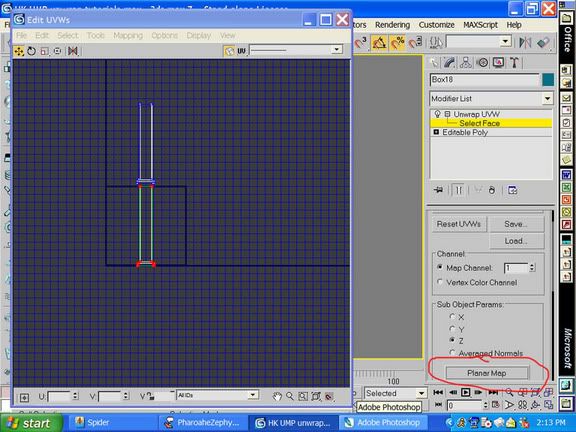
then click on planner map with it still on z and it will come up in the edit box. (you can close the edit box if you want when you have to do stuff in the perspective screen).
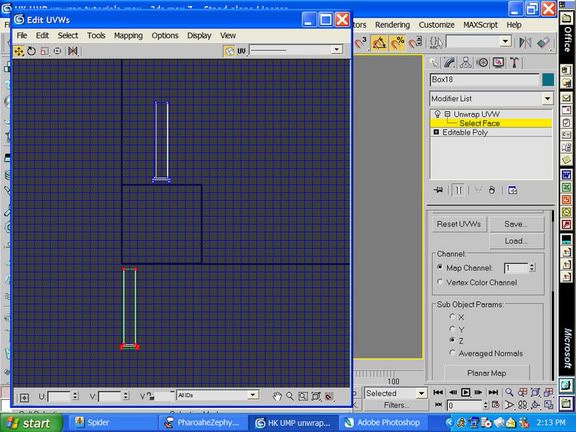
then what you want to do is move the side of the clip down out of the box.

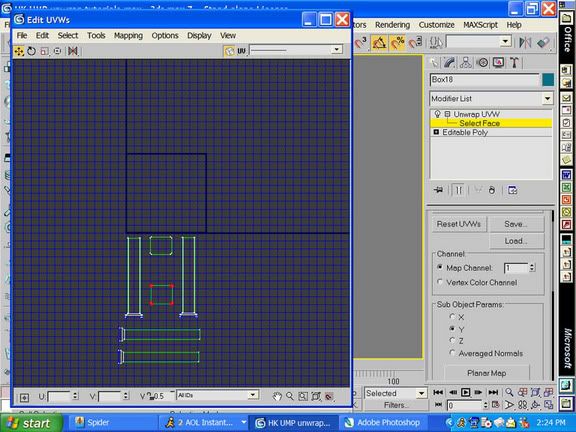
now select the faces on the right side of the clip.
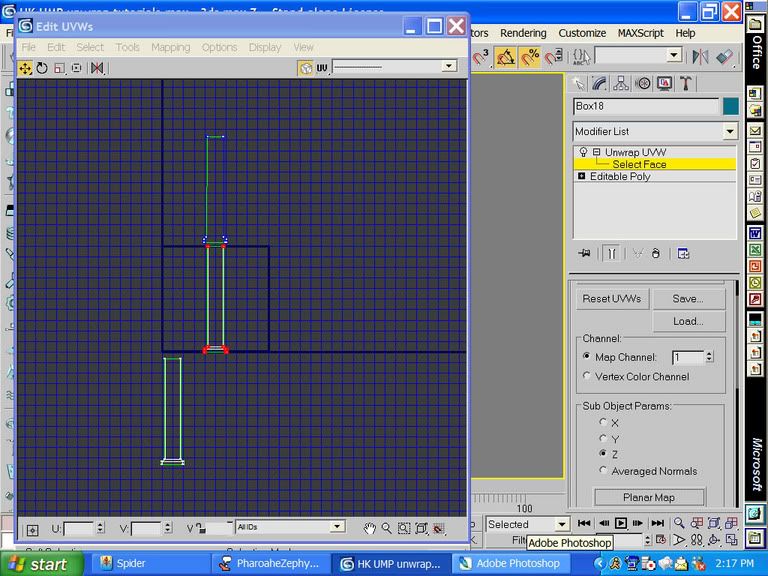
you can click planner map again.
then move it down next to the other side
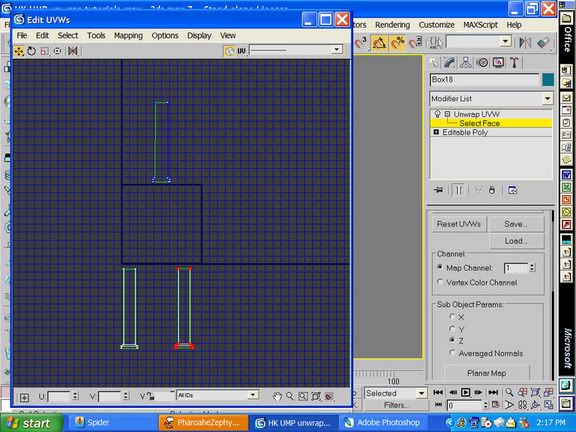
then select the front faces and make sure you click on x mapping. and you can click on planner map now

and you can click on planner map now

now move it down under the current pieces
now click on the back part of the clip
planner map it
move it under the pieces you have
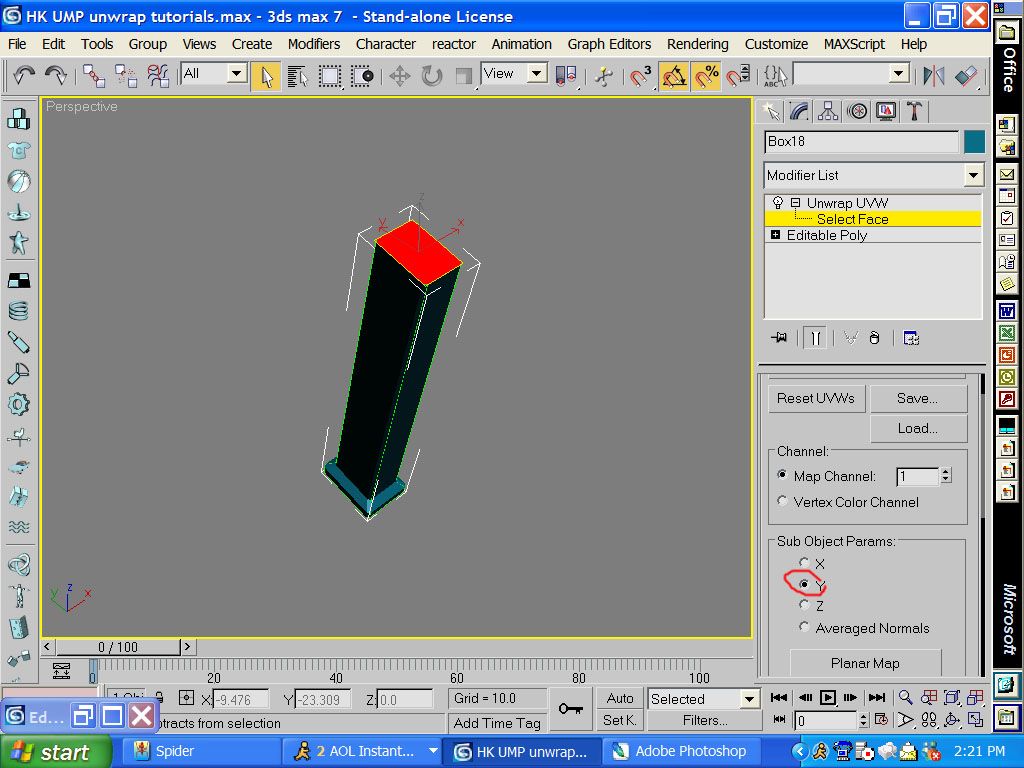
now click on the top of the clip with y mapping selected

now planner map it

when you map it it will be really big so just scale it down to about the above size

then you can move it inbetween the two clip pieces
now click on the bottom peices
and click on planner map again
this one is big too so you can scale it down and move it between the clips again.
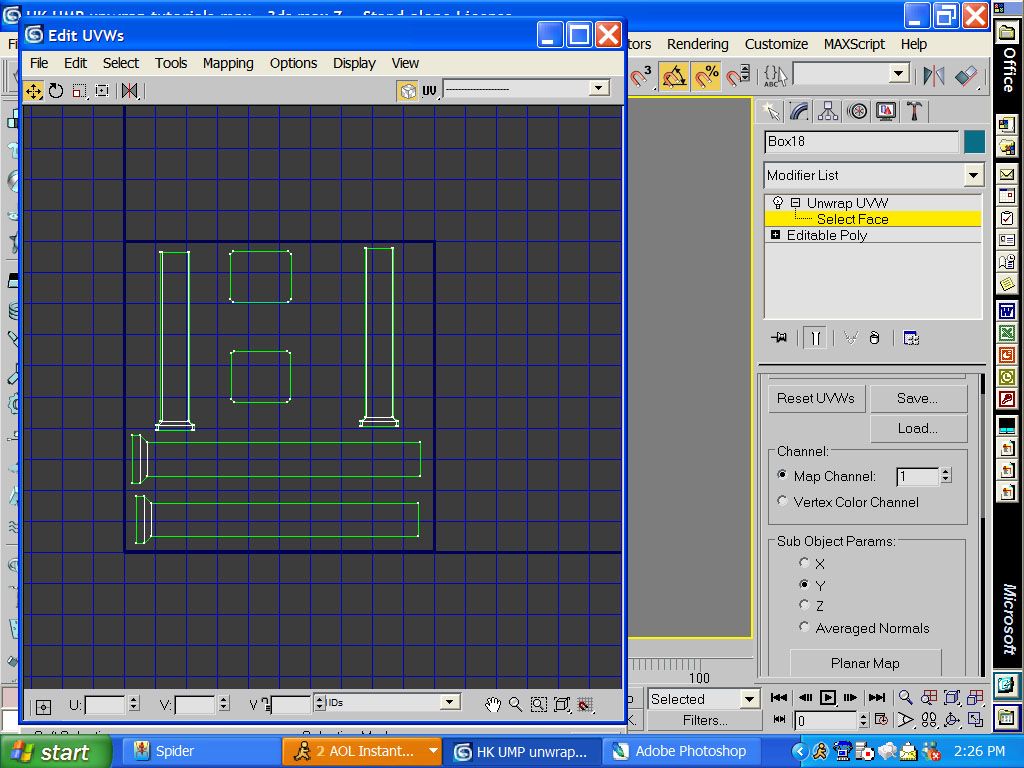
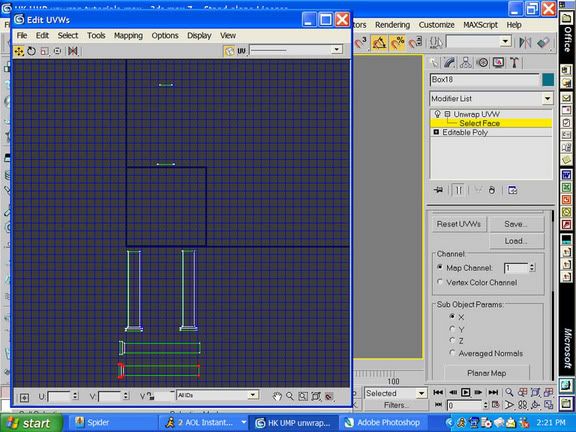
Now you have to move it in the box in the middle like i have done in the above pic. You will have to scale some stuff down to make it fit.
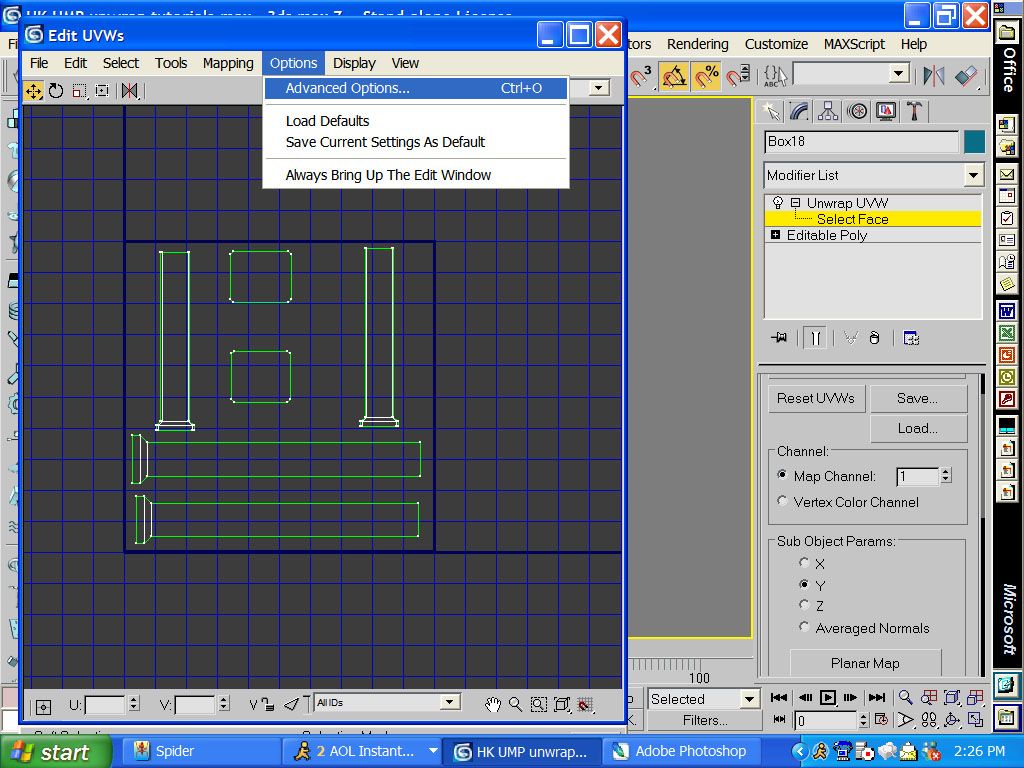
now go to advanced options
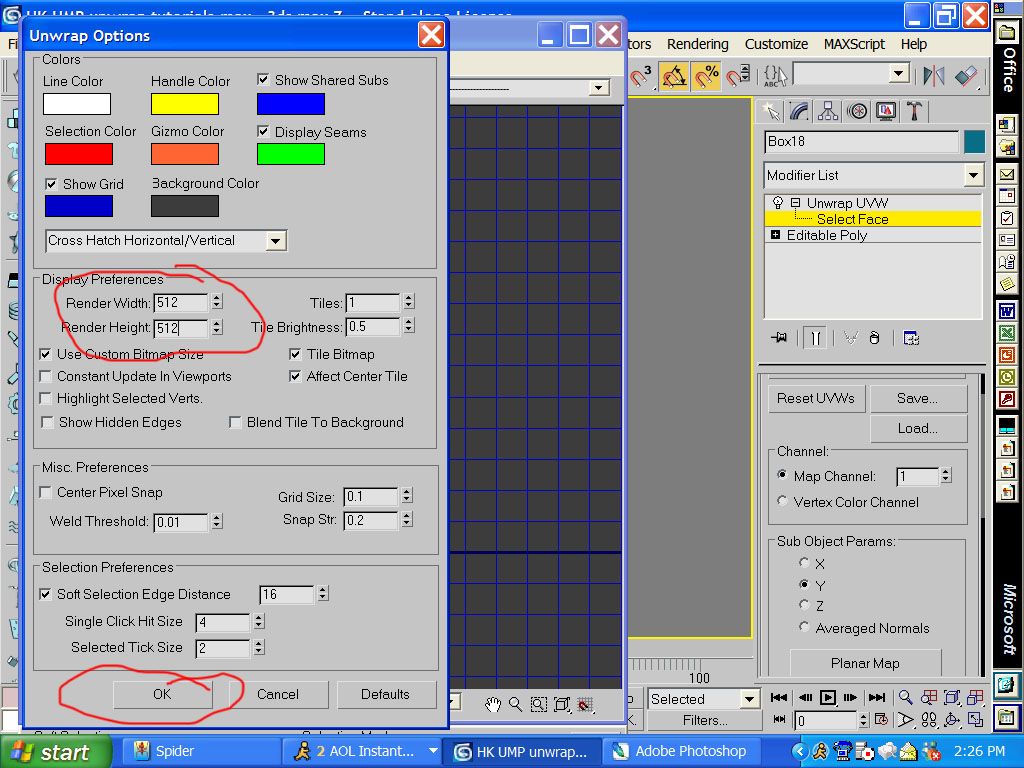
now you have to change the size to 512 x 512 for most games.
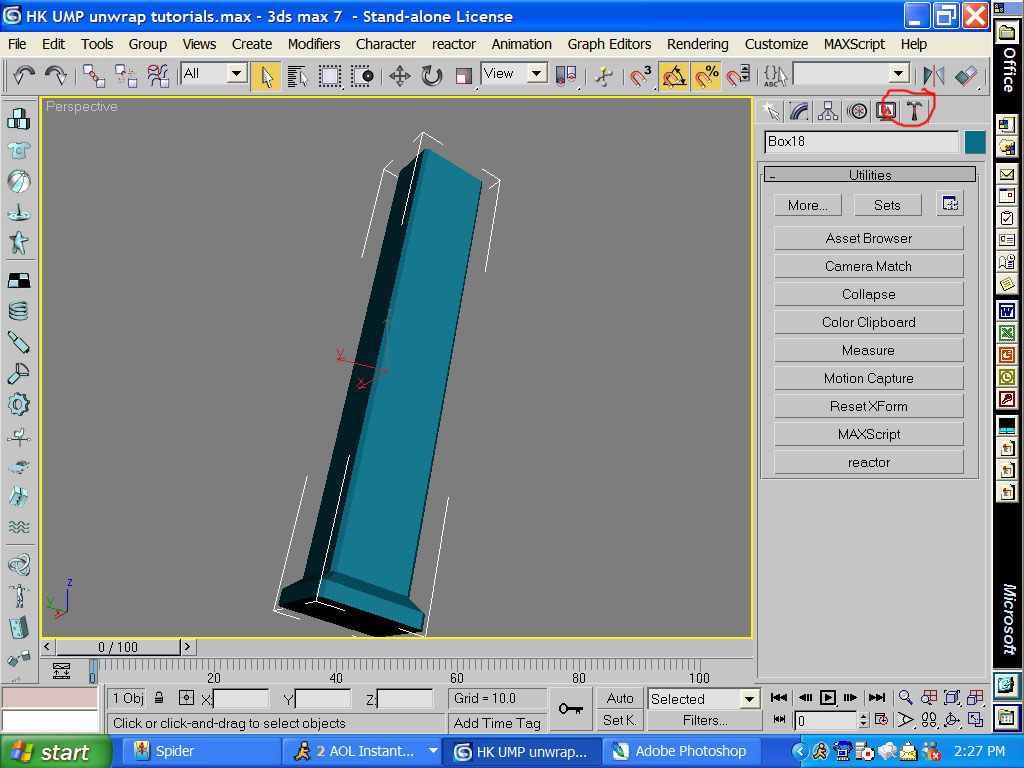
then click on the hammer button
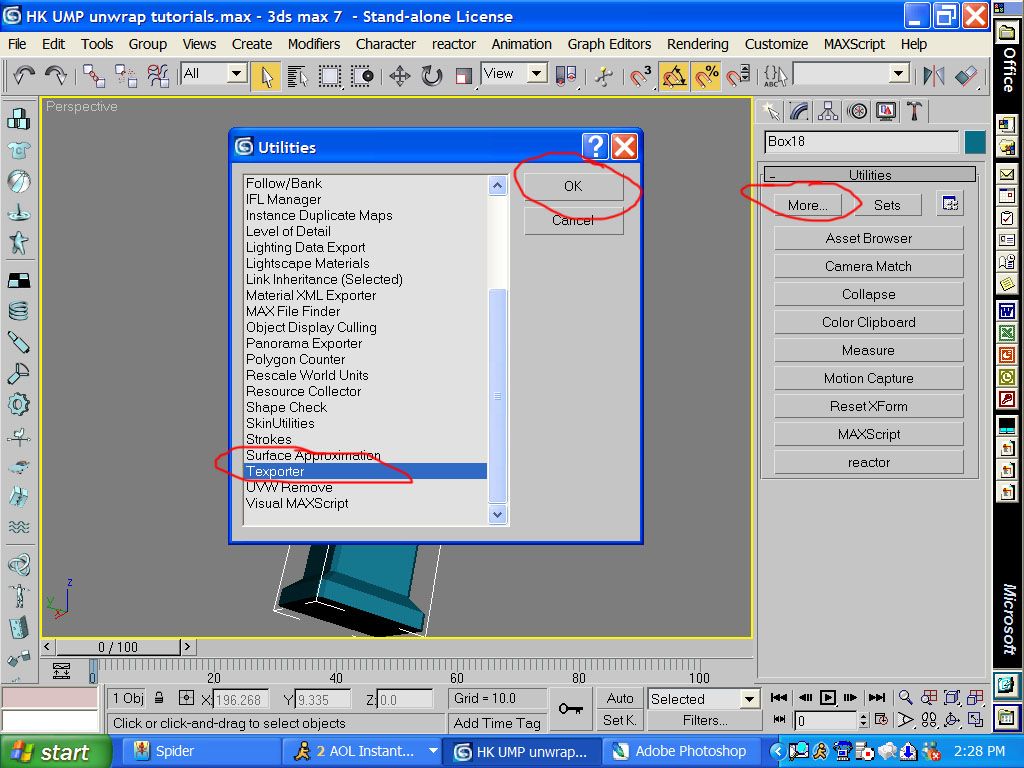
click on more. go to texporter and then click on ok
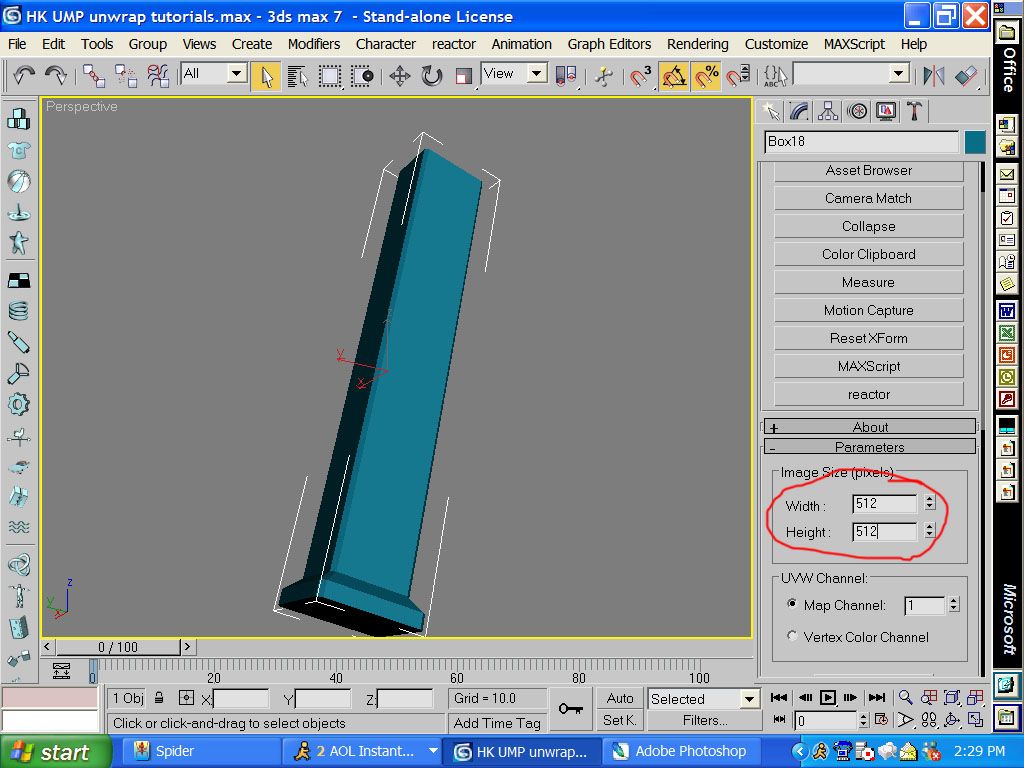
change the size to 512 x 512 to match what you did in advanced options.
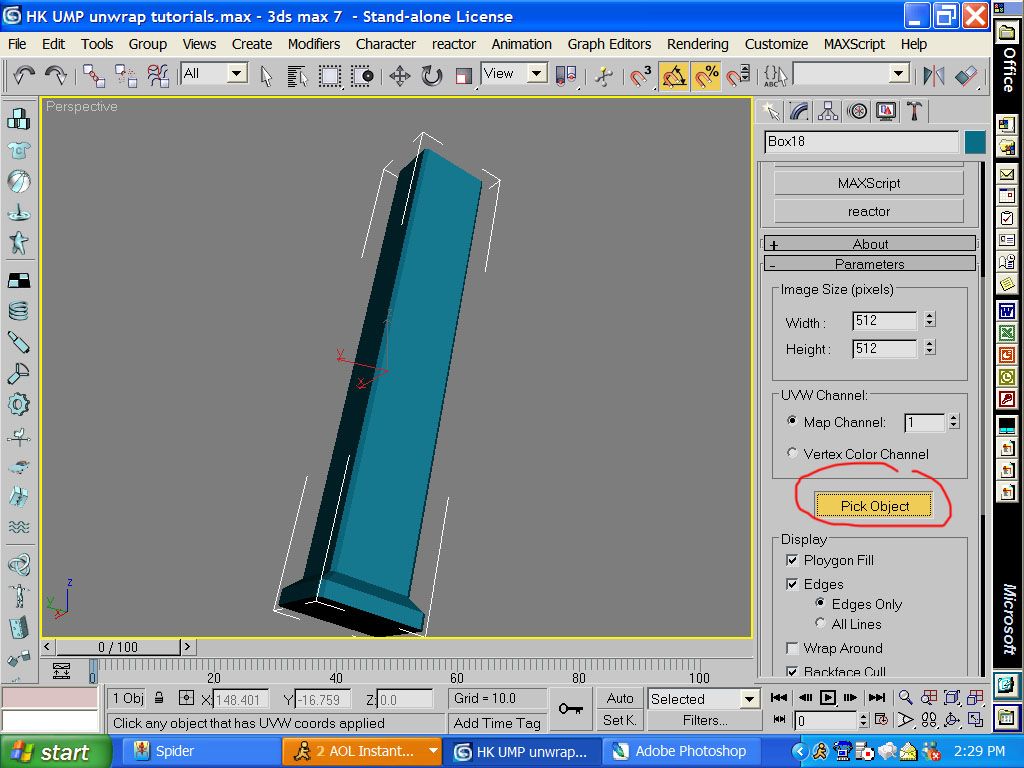
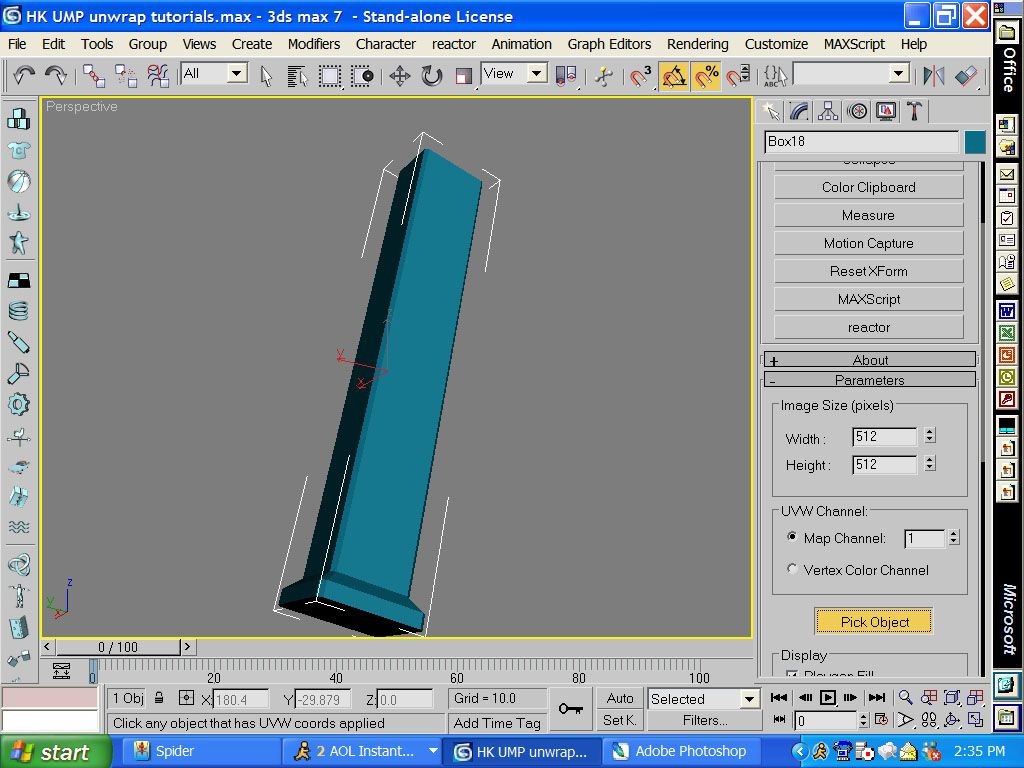
then click on pick object and select the clip.

then this screen will come up. you will notice not everything is on it. dont panic.
leave the texporter screen up and go to the unwrap screen again
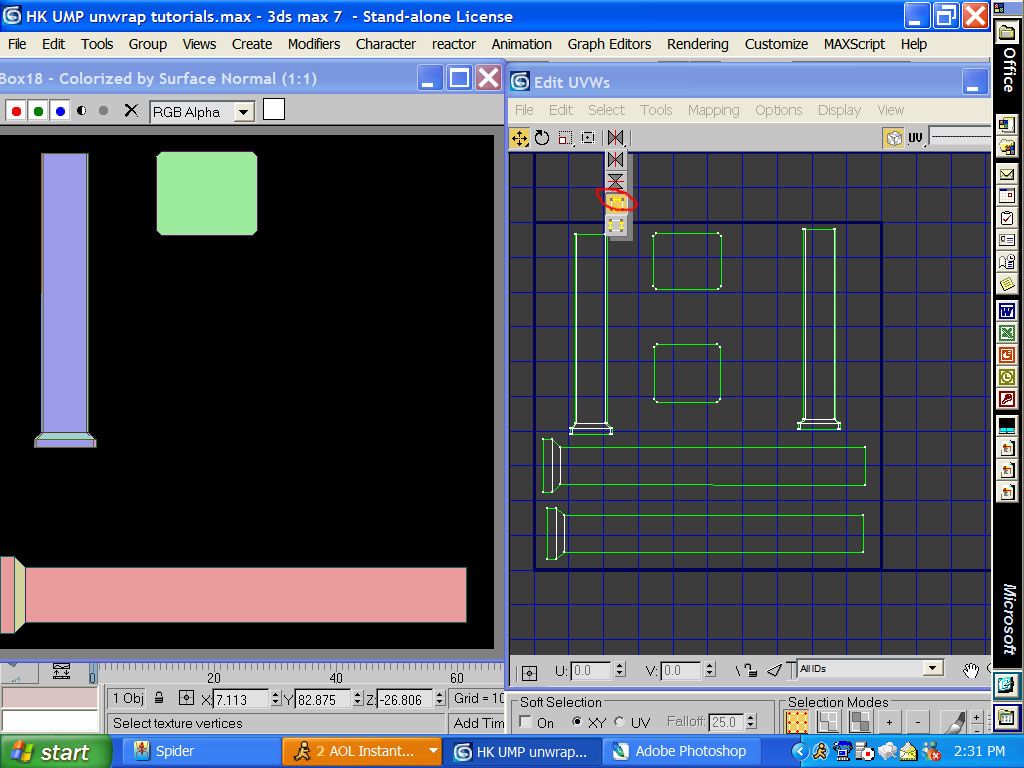
then you have to see what isnt there. then u drag down the option with the yellow arrows (not sure of the name).

then u select the peices that arent there and click that botton
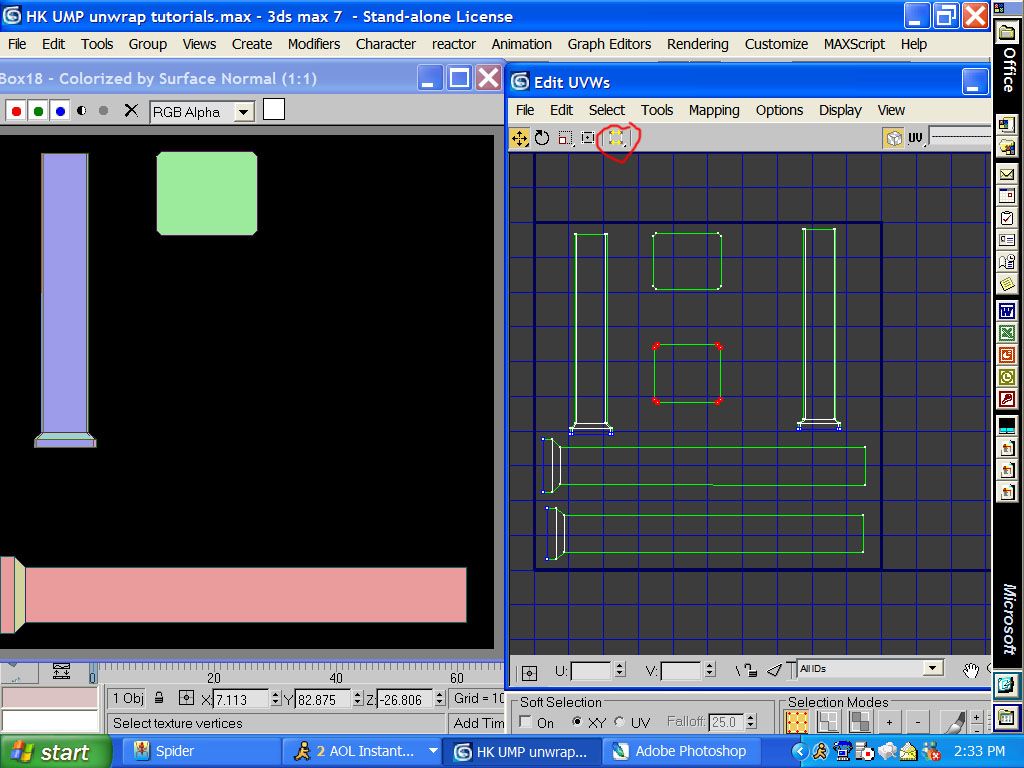
click the middle (doesnt matter the order)

then you will notice when you do it to this piece it goes backwards. its ok. just move it back into the box.
then go back to texporter
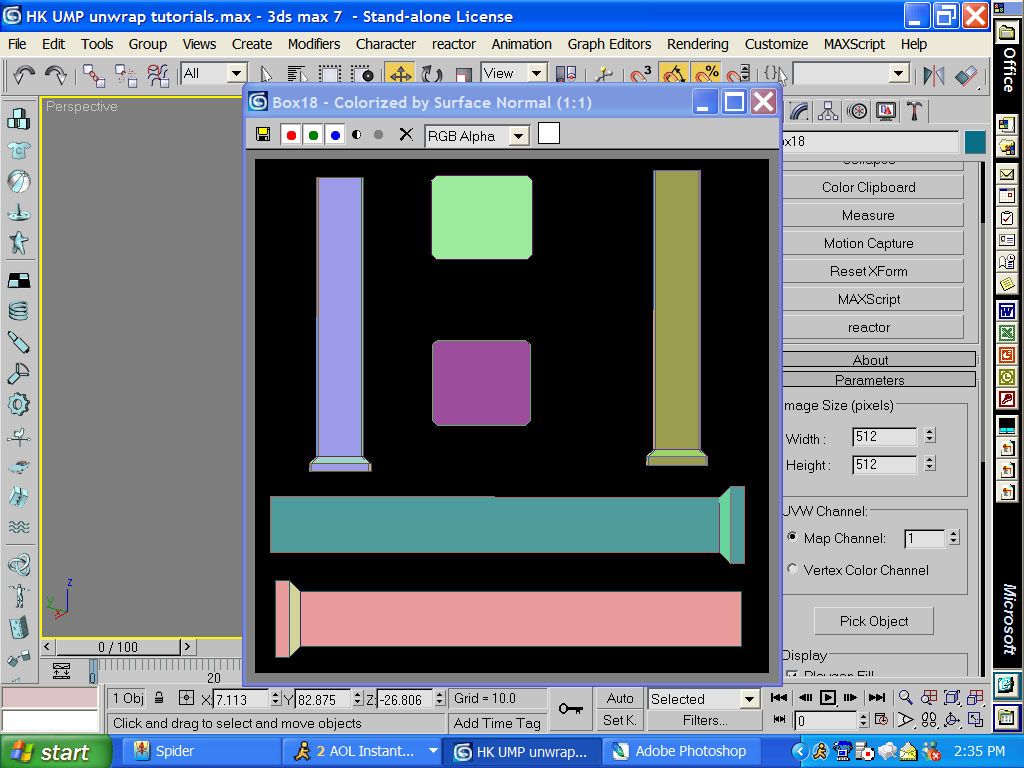
then click on the clip again and it will be fine
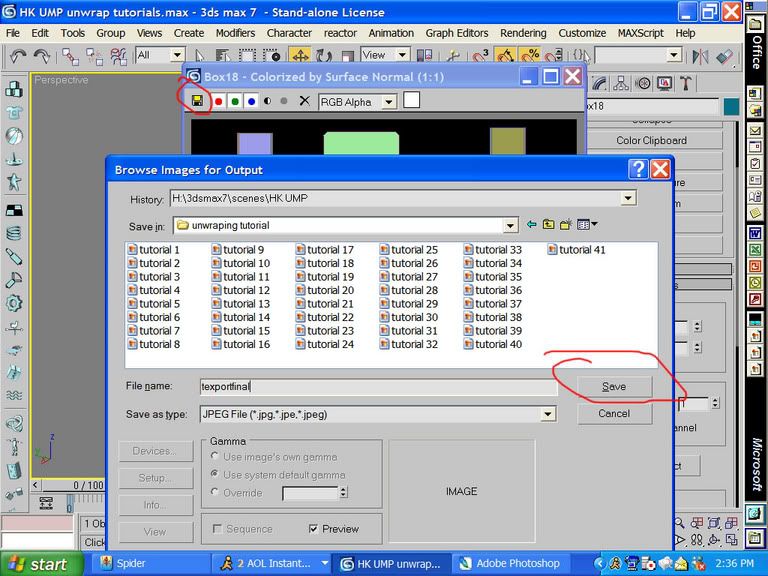
now you want to save it somewhere
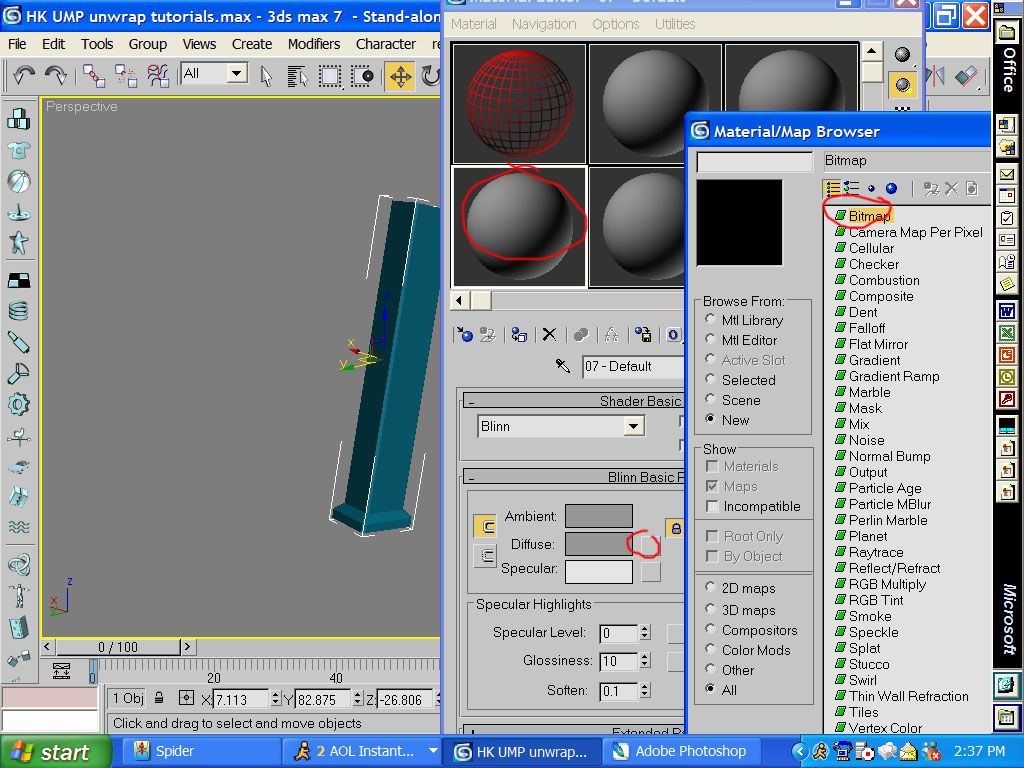
now press "M" to open the material editior. click the box next to diffuse and then double click on bitmap.
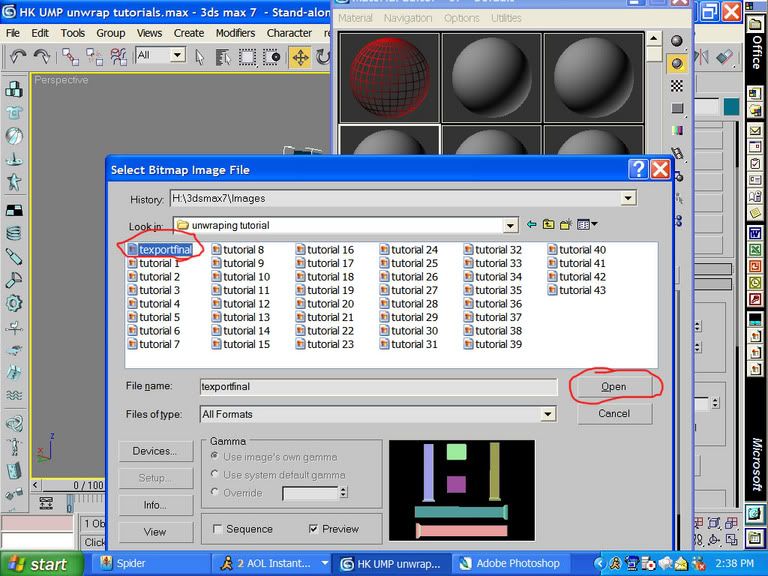
then open your textport .jpeg or whatever (you will have to make it a .tiff for halo in photoshop)
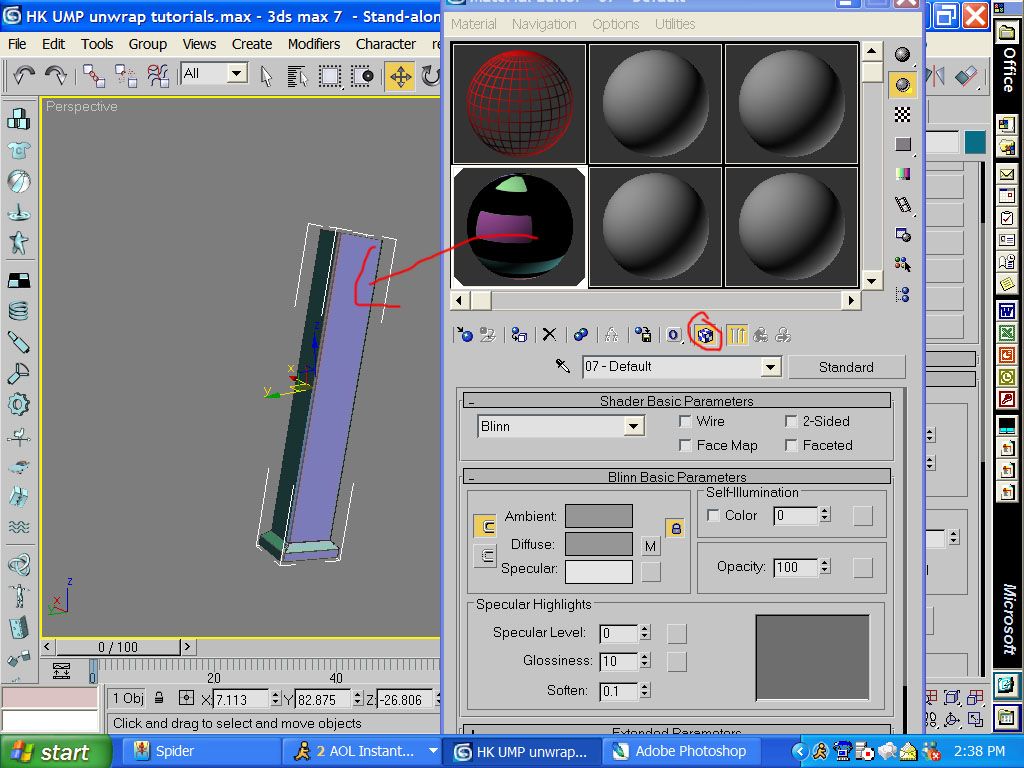
then drag it onto the model. you have to click the doted box so the texture shows up.
Hope this helped. If you have any questions ask me on aol SPYD3RPAINTBALL
Aslo when you have the sides in the unwrap screen if you drag the side verts out the texture will look better. But i didn't do that i remebered to do that at the end.
-Falcons
I NOW HAVE THE ZIP!
Thanks Wraith for uploading the max files.
http://bellsouthpwp.net/c/o/cold_fusion ... torial.zip
If you want a .3ds file ask me on aol
Sorry for the different size images i dont know why it came out like that.
Things you need
- Max 7 (to open my max file, talk to me on aol ill try to get a 3ds)
- Texporter (free download search google)
first go to the modifier tab
then click on unwrap uvw
then click on the + sign and click on select by face
when you click on edit this is the screen that you should see.
then drag your mouse over everything in the edit box.
then click on object params z then planner map.
then move that up out of the box. this will be a visual on what you did not map on the object yet. If you ever wonder what you did not map and something is there just drag you mouse over it and it will select the face on the model.
now select the faces on the left side of the model (including the ones that are chamfered)
then click on planner map with it still on z and it will come up in the edit box. (you can close the edit box if you want when you have to do stuff in the perspective screen).
then what you want to do is move the side of the clip down out of the box.
now select the faces on the right side of the clip.
you can click planner map again.
then move it down next to the other side
then select the front faces and make sure you click on x mapping. and you can click on planner map now
and you can click on planner map now
now move it down under the current pieces
now click on the back part of the clip
planner map it
move it under the pieces you have
now click on the top of the clip with y mapping selected
now planner map it
when you map it it will be really big so just scale it down to about the above size
then you can move it inbetween the two clip pieces
now click on the bottom peices
and click on planner map again
this one is big too so you can scale it down and move it between the clips again.
Now you have to move it in the box in the middle like i have done in the above pic. You will have to scale some stuff down to make it fit.
now go to advanced options
now you have to change the size to 512 x 512 for most games.
then click on the hammer button
click on more. go to texporter and then click on ok
change the size to 512 x 512 to match what you did in advanced options.
then click on pick object and select the clip.
then this screen will come up. you will notice not everything is on it. dont panic.
leave the texporter screen up and go to the unwrap screen again
then you have to see what isnt there. then u drag down the option with the yellow arrows (not sure of the name).
then u select the peices that arent there and click that botton
click the middle (doesnt matter the order)
then you will notice when you do it to this piece it goes backwards. its ok. just move it back into the box.
then go back to texporter
then click on the clip again and it will be fine
now you want to save it somewhere
now press "M" to open the material editior. click the box next to diffuse and then double click on bitmap.
then open your textport .jpeg or whatever (you will have to make it a .tiff for halo in photoshop)
then drag it onto the model. you have to click the doted box so the texture shows up.
Hope this helped. If you have any questions ask me on aol SPYD3RPAINTBALL
Aslo when you have the sides in the unwrap screen if you drag the side verts out the texture will look better. But i didn't do that i remebered to do that at the end.
-Falcons